Objective 5.1 Topics:
- Install and Configure vSphere PowerCLI
- Use Basic and Advanced PowerCLI Cmdlets to Manage a vSphere Deployment
- Analyze a Sample Script, then Modify the script to Perform a Give Action
- Use PowerCLI to Configure and Administer Auto Deploy (including Image Builder)
- Create a Report from a PowerCLI Script
Install and Configure vSphere PowerCLI
This is pretty straight forward. We will need to set the Execution Policy prior to sending any commands across.
Run PowerShell or PowerCLI under ‘Administrator’ (Right click ‘run as Administrator).
Set the Execution Policy by: Set-ExecutionPolicy RemoteSigned
Use Basic and Advanced PowerCLI Cmdlets to Manage a vSphere Deployment
Join/Leave the Customer Experience Improvement Program
Sorry VMware. 😉
Connecting to a vCenter Server System
Running vSphere PowerCLI Cmdlets Asynchronously
By default, PowerCLI only returns an output after the task has been completed. If we want to change to return to the command line immediately, we can run the Runasync parameter.
Remove-VM $vmList -RunAsync
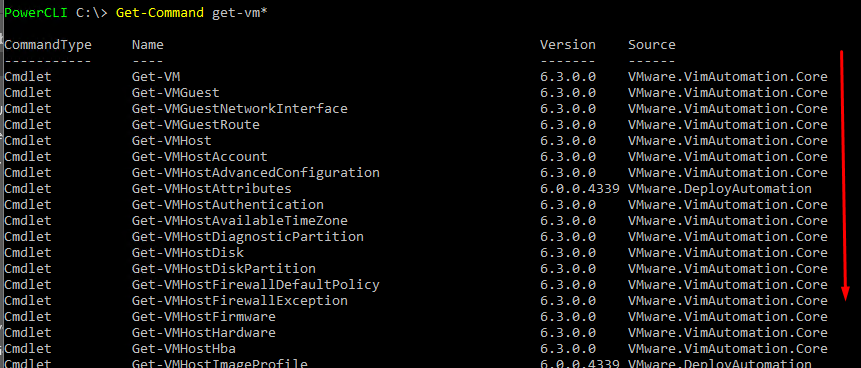
Get-Command (Your Friend)
We can run the Get-Command for arguments and find all available commands.
Get-VMHost – list all host information
Get-VirtualSwitch – list vDS switch information
Get-VirtualSwitch -Standard – list standard switch information
Get-VM – list information on all VMs
Get-Datastore – list information on all Datastores
Get-NetworkAdapter – list of all network adapters from all VMs
We can add the values we want to see so we can get a little bit more information.
Invoke-VMScript – pass a command from the PowerCLI shell to the Guest OS.
Analyze a Sample Script, Then Modify The Script to Perform a Given Action
You can use a specification provided in an XML file to automate the creation of virtual machines on vCenter Server.
Prerequisites
Verify that you are connected to a vCenter Server system.
The myVM.xml file must be present with the following content:
<CreateVM>
<VM>
<Name>MyVM1</Name>
<HDDCapacity>100</HDDCapacity>
</VM>
<VM>
<Name>MyVM2</Name>
<HDDCapacity>100</HDDCapacity>
</VM>
</CreateVM>
Procedure
Read the content of the myVM.xml file.
[xml]$s = Get-Content myVM.xml
Create the virtual machines.
$s.CreateVM.VM | foreach {New-VM -VMHost $vmHost1 -Name $_.Name -DiskGB $_.HDDCapacity}
Use PowerCLI to Configure and Administer Auto Deploy (Including Image Builder)
Step 1: Connect to vCenter Server
Step 2: Add the ESXi Image Software Depot
ESXi image depots can be downloaded from the VMware Website as part of the vSphere downloads if you don’t have them already.
Step 3: View/Verify the Image Profiles
Step 4: Clone the Image Profile
Step 5: Verify the New Image Profile
Step 6: Add the HA Agent Depot
Since we are building this image for Auto Deploy we want to be able to put it in our cluster so we’ll need an agent for that to be installed before it joins the cluster. We can obtain this directly from vCenter server over http.
The URL is case sensitive.
Step 7: Add the HA Agent Package to the Image Profile
Step 8: Add a Deploy Rules
The Deploy Rule controls what image profile, host profile, and/or vCenter Server location each host is provisioned
with. Now we need to create a rule that specifies the hosts on which the Host Profile will be applied.
Step 9: Create a Deploy Rule
Run this command first or we’ll fail signature checks.
$DeployNoSignatureCheck=$true
New Deploy Rule Creation
Perimeters Explained:
- vCallaway-VCAP-5.1-boot is the new deploy rule name
- vCallaway-Image1 is the ESXi Image Profile we previously built
- ESXi-02 Host Profile is the host profile we want to apply to the image
- ipv4= is the IP address we want to use for the ESXi Host
- hostname= is the hostname we want to assign the host
- domain= is the domain name we want to assign the host
Once this is done uploading to the Auto Deploy server we will need to add the deploy rule.
Step 10: Add the Deploy Rule
Command: Add-DeployRule “vCallaway-VCAP-5.1-boot”
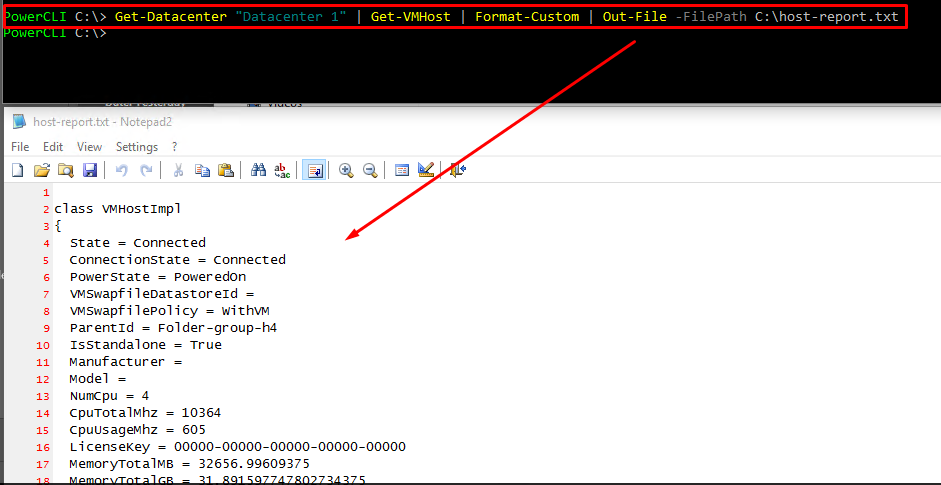
Create a Report From a PowerCLI Script


