As I’ve gone through the VCAP6 Deploy blueprint one of the things I haven’t grasped fully yet is the ability to understand how auto deploy with host profiles actually works. Meaning, I’m still not comfortable with doing the whole process on my own. Online resources are a bit parted in terms from A-Z. I’m going to build a host here to help myself go from A to Z and hopefully this will help someone else along the way.
Auto Deploy with Host Profiles Workflow
Auto Deploy Configuration
Prerequisites
- Functioning DHCP Server w/ scope options
- Functioning TFTP Server
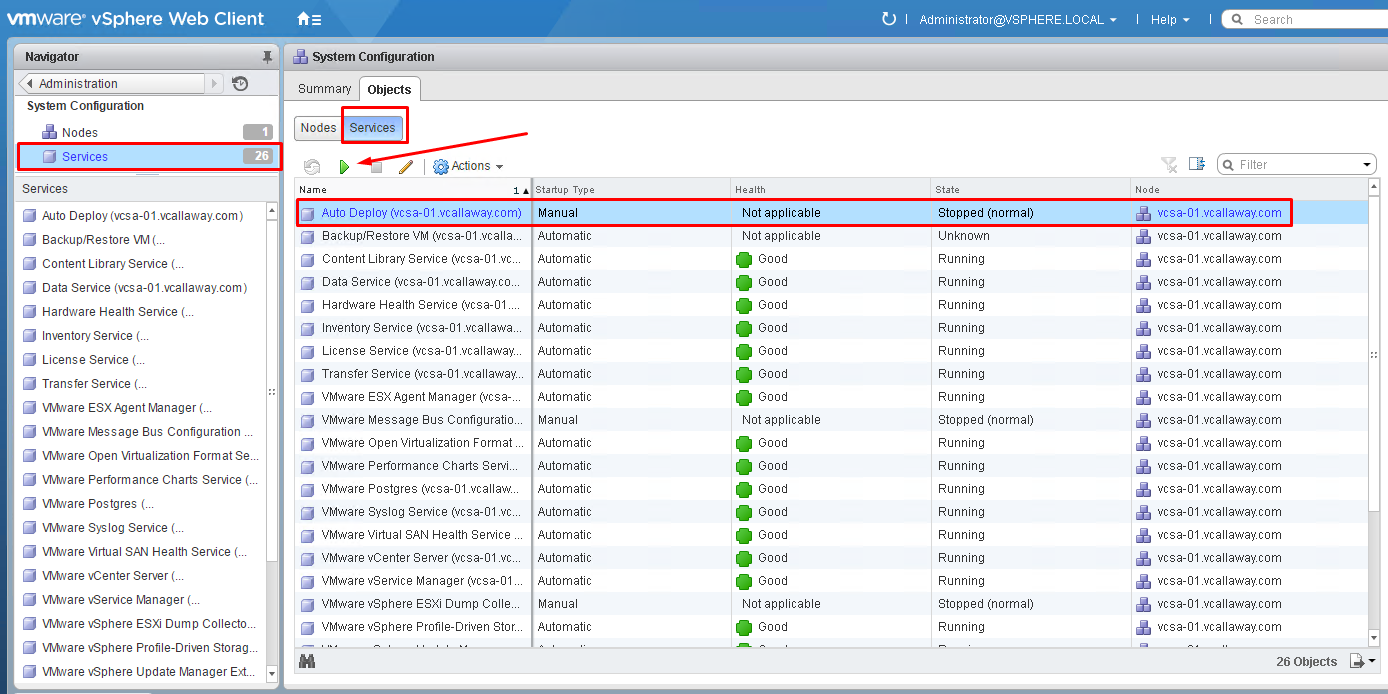
- Enabled Auto Deploy on vCenter Server
- Download Auto Deploy ZIP and extract to TFTP Server root directory.
- Install VMware PowerCLI and set the Execution Policy
Install DHCP Server and configure options.
DHCP server is not authorized at the moment. I’m using another DHCP Server for this lab, yours should be authorized as it’s required to function.
Install Configure TFTP Server
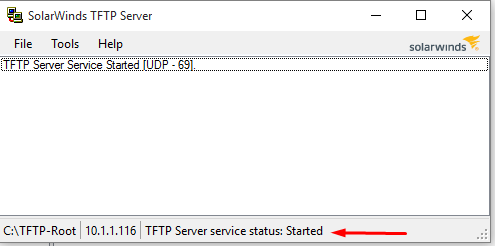
I’m using Solarwinds, it’s a free download. Make sure the service is running and the ports are open on the firewall.
Enable AutoDeploy
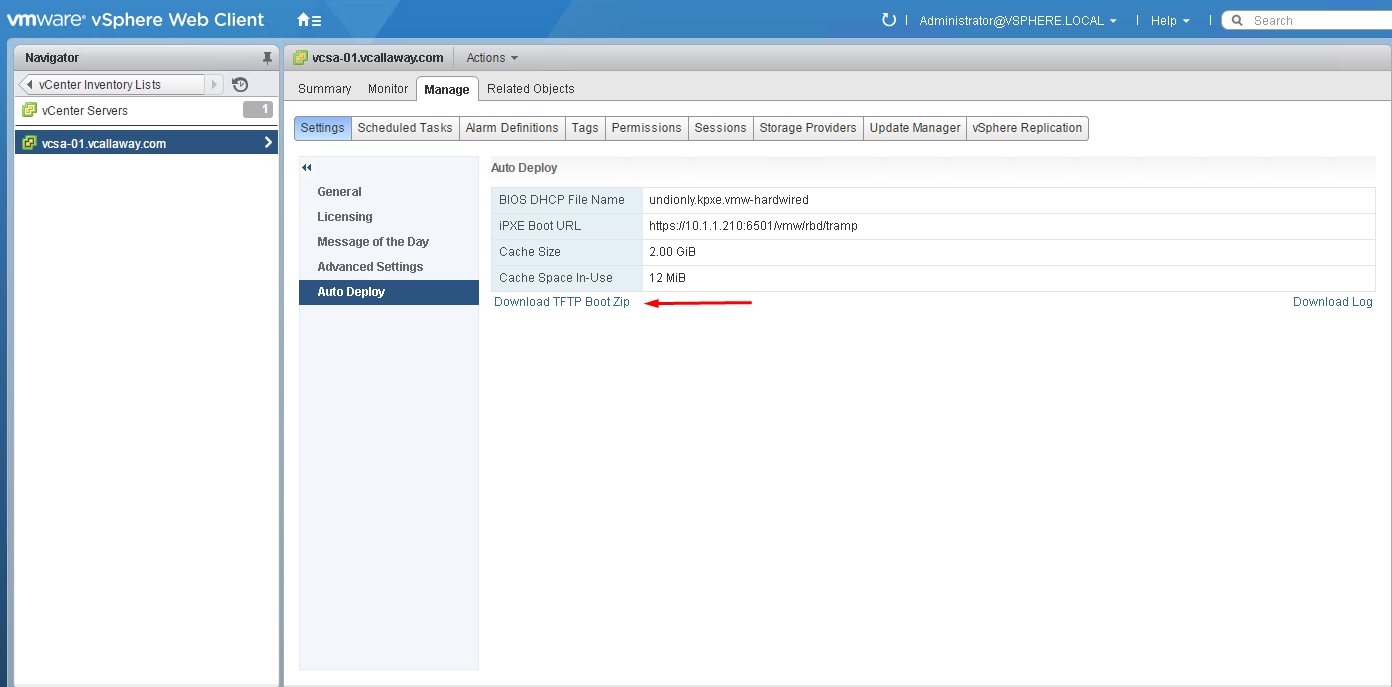
Confirm AutoDeploy is enabled and download the TFTP Zip Boot File
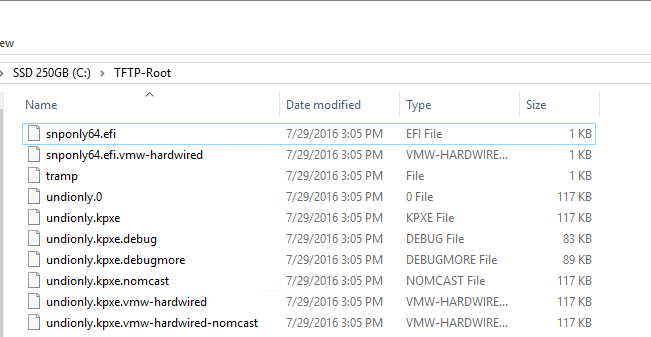
Unzip the ZIP file and place the contents in the root TFTP folder
Install VMware Power CLI and Set Execution Policy
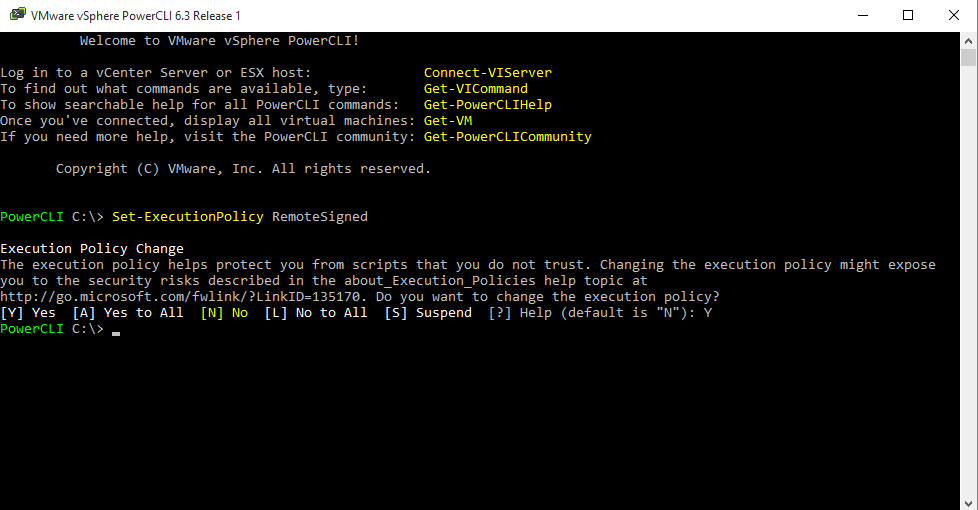
Install the application. Run it as ‘Administrator’, and issue the command
“Set-ExecutionPolicy RemoteSigned” (no quotes). We need to do this to be able to run our scripts.
Connect to the vCenter Server
Now we’re ready to start configuring and building our image and finally use the Auto Deploy feature in vSphere.
Let’s get started.
Add our ESXi Software Depot
We can grab an image directory from VMware or we can use a local one we’ve already downloaded and configured.
VMware Online Depot
Add-EsxSoftwareDepot https://hostupdate.vmware.com/software/VUM/PRODUCTION/main/vmw-depot-index.xml
My Local One (I’ll be using this one)
Add Depot containing the vmware-fdm package (So we can add it to vCenter)
Check the available Image Profiles from the Depot(s) that have been configured.
Let’s clone the image so we can start customizing a new one
Since I’m using a nested environment, for vendor I just put ‘Callaway’. If it was a custom Dell or HP Image you could want to put that name with model number or something more identifiable.
Now we have a Image Profile that we can build on. Let’s add the vmware-fdm package.
Export it to be used later.
Exporting it to the TFTP directory so it can be grabbed later by a booting host.
Create a generic auto deploy rule.
We’ll want this host to be generic so can create a host profile later.
Add the rule
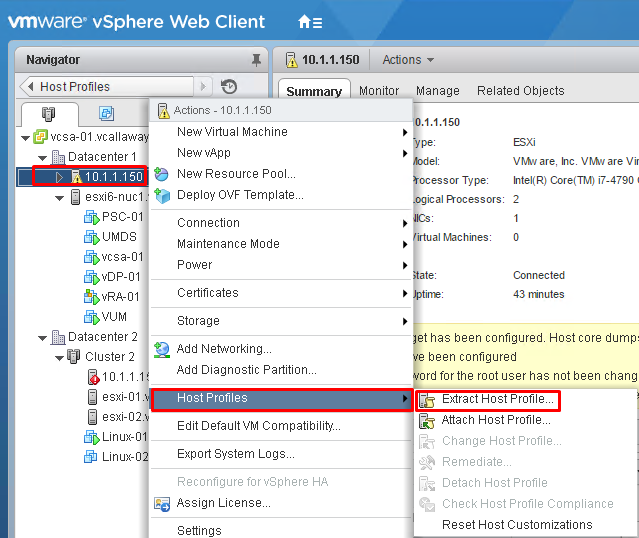
Boot the host up. Once it’s in vCenter we need to create a host profile for it.
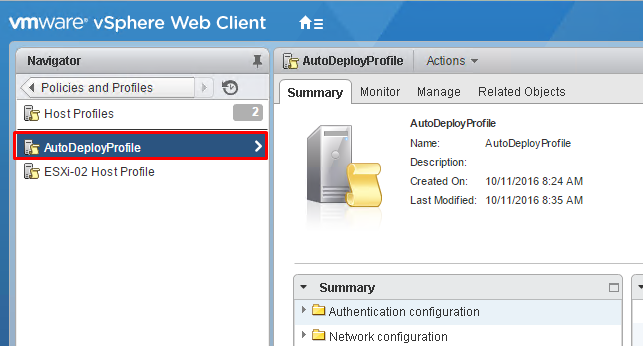
I called mine ‘AutoDeployProfile’.
Create new specific deploy rules to be used with our Host Profile.
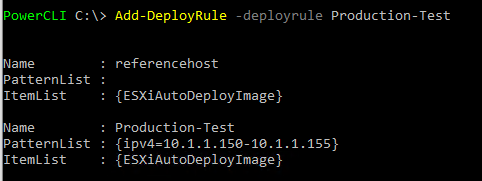
What we’re saying here is that we want to create a rule named ‘Production-Test’ using our Image and assign it to hosts in the 10.1.1.150-155 IP range.
Add the rule
Create rule to add Host Profile to the Image
Saying that our Host Profile ‘AutoDeployProfile’ will be applied to the same IP range.
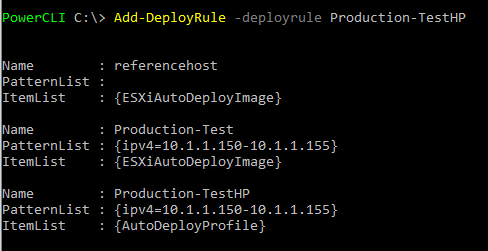
Add the rule
Notice, that all the rules are showing up that we’ve previously created.
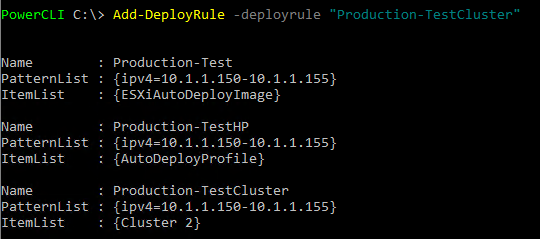
Create another rule that will add the host to a cluster
Add the rule
Let’s delete our Reference host rule since we don’t need it anymore.
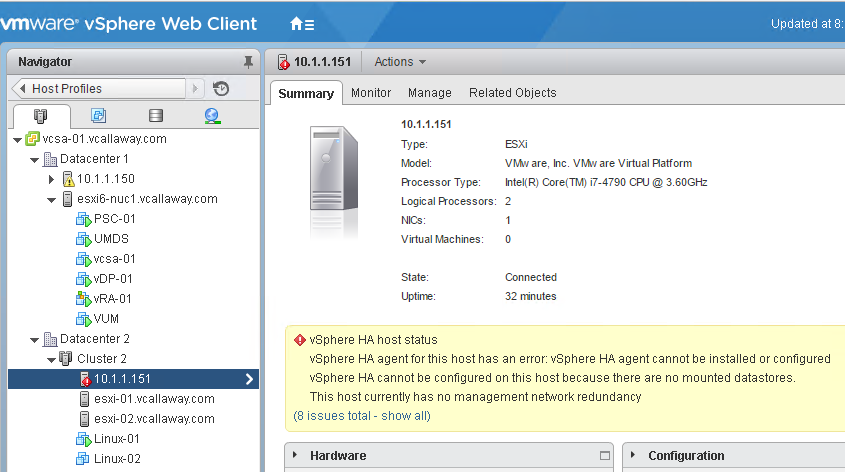
Let’s see how our new host looks after booting.
We obviously have some missing settings such as storage and networking, but we can continue to build our host profile or use a new reference host to take care of that with host profiles. I’ll add more later on building more host profiles and reference hosts to get a auto deployed host fully integrated into a cluster.








Very good write up on Auto Deploy.